My first Twill module

Updated version for Laravel 10 / Twill 3 on Apr 14, 2023
In this article, we will see the creation and customization of a first content module.
Module creation
In Twill terminology, a Module represents all the files needed to manage a content type: Model (with migration), Repository, Controller, Request and Form view.
A Module can be initiated with the CLI generator, if we look at the official documentation, we see it's an artisan command that takes options:
php artisan twill:make:module moduleName {options}
The moduleName is the singular name of your content type and Twill generates some files with plural name (so avoid news as it already ends with a s and will break some functionalities).
The options are (taken from the official documentation):
--hasBlocks (-B), to use the block editor on your module form
--hasTranslation (-T), to add content in multiple languages
--hasSlug (-S), to generate slugs based on one or multiple fields in your model
--hasMedias (-M), to attach images to your records
--hasFiles (-F), to attach files to your records
--hasPosition (-P), to allow manually reordering of records in the listing screen
--hasRevisions (-R), to allow comparing and restoring past revisions of records
--hasNesting (-N), to enable nested items in the module listing
--parentModel=, to generate the route for a nested module--bladeForm, to generate a Blade form instead of using the new Form builder (more info here)
Twill is amazing for this as you can choose the features you want to have available for your content, keeping simple content simple. All work with PHP Traits and additional classes, so if you forget an option, you can add it later based on sample codes.
Let's create our first Module to handle static pages
We will call this Module contentPage and we will need Blocks (to have flexible content), Translations, Slugs, Medias, Position (to order them in the administration) and Revisions (we will not attach Files directly but maybe through Blocks):
php artisan twill:make:module pageContent -BTSMPR

# If you want to handle the form through a Blade template, you can add the --bladeForm option (you still can create the file manually afterward
php artisan twill:make:module pageContent -BTSMPR --bladeForm
The output we can see in our terminal:
Migration created successfully! Add some fields!
Models created successfully! Fill your fillables!
Repository created successfully! Control all the things!
Controller created successfully! Define your index/browser/form endpoints options!
Form request created successfully! Add some validation rules!
Form view created successfully! You can now include your form fields.

 Do you also want to generate the preview file? [no]:
  [0] no
  [1] yes
 >

The following snippet has been added to routes/twill.php:
-----
TwillRoutes::module('pageContents');
-----
To add a navigation entry add the following to your AppServiceProvider BOOT method.
-----
use A17\Twill\Facades\TwillNavigation;
use A17\Twill\View\Components\Navigation\NavigationLink;
TwillNavigation::addLink(
    NavigationLink::make()->forModule('pageContents')
);
-----
Do not forget to migrate your database after modifying the migrations.

Enjoy.
Files generated
It generates the following files in your application:
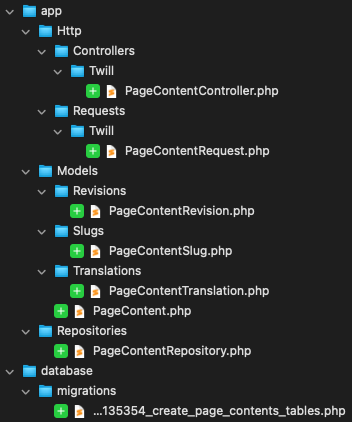
If you added the --bladeForm option, you also have the form template file:

What next
Check or edit the Routes according to the structure your want
Add a navigation entry
Customize the fields of the Model
Create the form accordingly (Blade components or OOP builder)
Customize the admin Controller if needed
Morph map
Routes and Navigation configuration
Routes configuration
Since Twill 3, the module routes are automatically added at the end of the file as a root entry (if you are still using Twill 2, you need to add it manually).
/routes/twill.php
<?php

use A17\Twill\Facades\TwillRoutes;

TwillRoutes::module('pageContents');
Navigation entry
Since Twill 3, there is a new way to manage navigation, registering it in the AppServiceProvider (you still can use the legacy method defining your navigation in a config/twill-navigation.php file). More info in the official documentation
You can copy/paste what the CLI output suggested:
/app/Providers/AppServiceProvider.php
<?php

namespace App\Providers;

use A17\Twill\Facades\TwillNavigation;
use A17\Twill\View\Components\Navigation\NavigationLink;

class AppServiceProvider extends ServiceProvider
{
    /**
     * Bootstrap any application services.
     */
    public function boot(): void
    {
        TwillNavigation::addLink(
            NavigationLink::make()->forModule('pageContents')
        );
    }
}
If you want to customize the title in the navigation, you can chain it with the call of title() method (don’t forget to add use Illuminate\Support\Str; if you use the example below):
    public function boot(): void
    {
        TwillNavigation::addLink(
            NavigationLink::make()
                ->title(Str::ucfirst(__('pages')))
                ->forModule('pageContents')
        );
    }
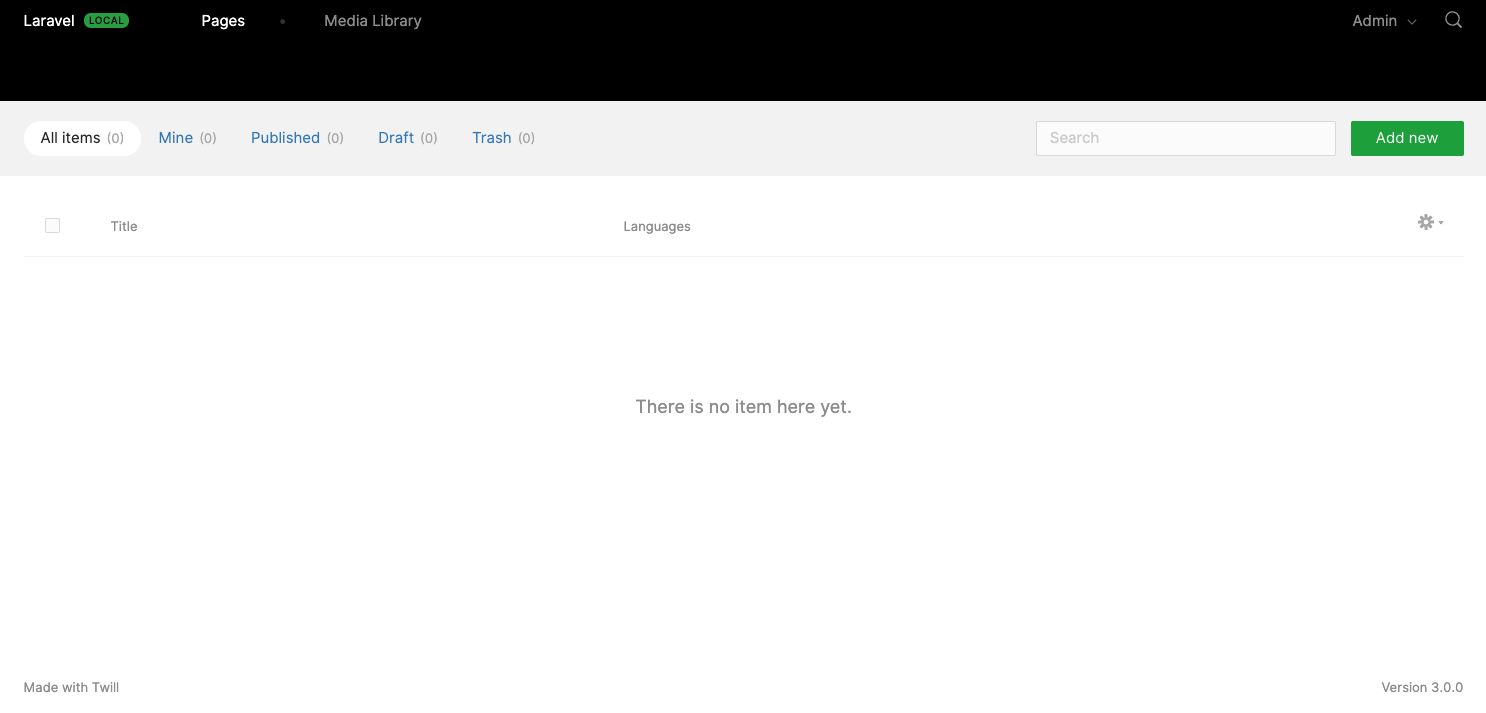
To see our Module administration interface without triggering an error, we need to execute the migration via php artisan migrate. We will do it later as we want to customize the attributes of our model, but here is an example of what you will see:
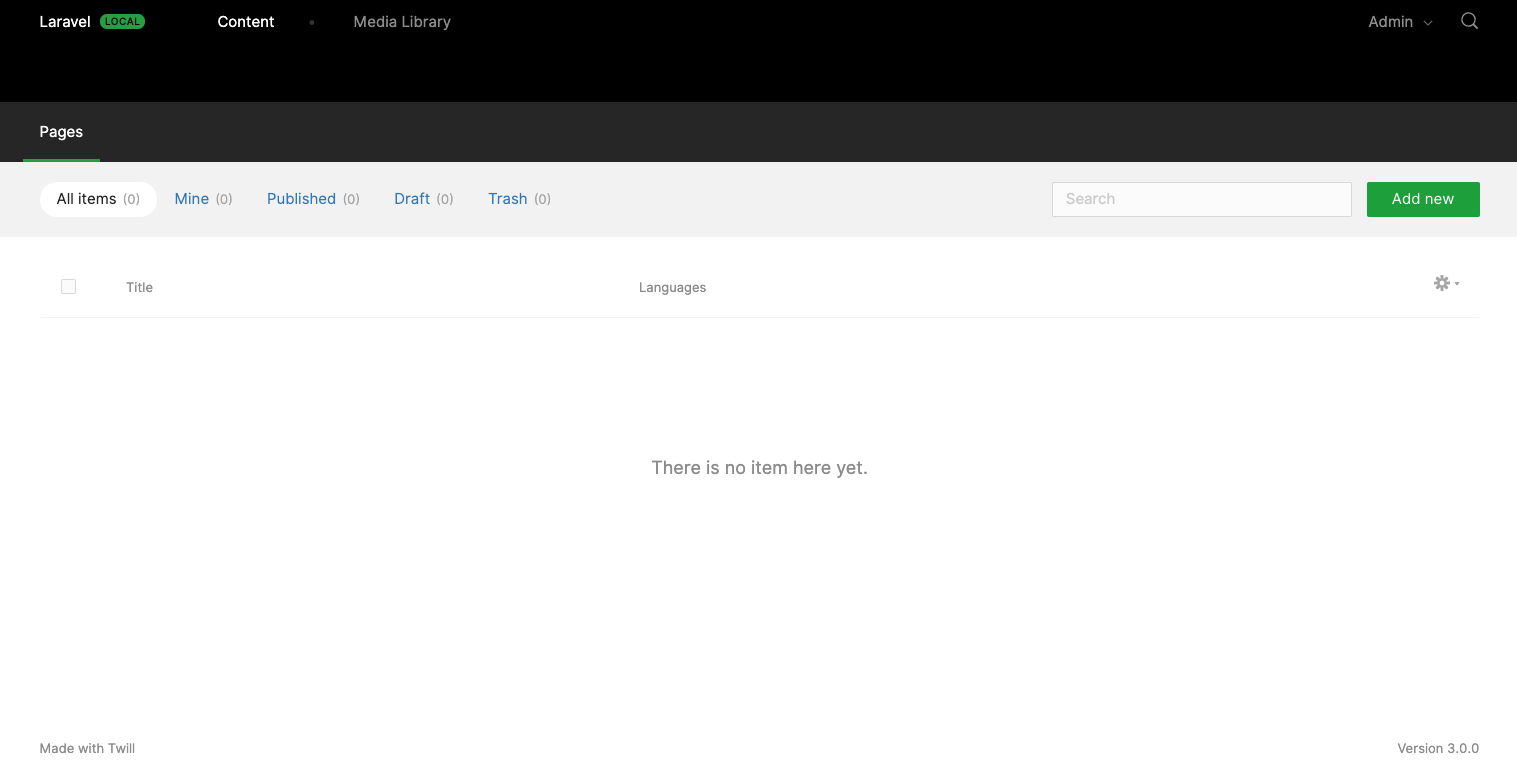
Navigation reorganization
The default configuration adds our Module to the primary level of the navigation. As we want to organize our navigation, we will modify this configuration to access our Module at a secondary level of a global Content entry (Twill allows you to have up to 3 levels for your navigation):
/routes/twill.php
<?php

use A17\Twill\Facades\TwillRoutes;
use Illuminate\Support\Facades\Route;

Route::group(['prefix' => 'content'], function () {
    TwillRoutes::module('pageContents');
});
/app/Providers/AppServiceProvider.php
    public function boot(): void
    {
        TwillNavigation::addLink(
            NavigationLink::make()
                ->title(Str::ucfirst(__('content')))
                ->forModule('pageContents')
                ->doNotAddSelfAsFirstChild()
                ->setChildren([
                    NavigationLink::make()
                        ->title(Str::ucfirst(__('pages')))
                        ->forModule('pageContents')
                ]),
        );
    }
What it does
For the route, using standard Laravel routing, we encapsulate our Module routes definition in a group with the content prefix. As Twill routes already add twill prefix, our Module routes names will start with twill.content.pageContents
For the Twill navigation, we encapsulate our module as a child of a primary content navigation link which has the following attributes:
title(): the text displayed in the navigation
forModule(): the module that will be displayed on click, for now, we want the index of our Module
doNotAddSelfAsFirstChild(): without this method, we would have 2 entries on the secondary level:
ContentandPagessetChildren(): the list of the navigation links for the secondary level
Model customization
The migration, model and form files created by the generator are a template with default fields.
In our case, we want:
a title that can be translated
meta title and description that can be translated
a position to sort manually our pages in the listing of the administration interface
a block editor for all the content (we will focus on this part in a later article)
Here is what the final files look like.
/database/migrations/..._create_page_contents_tables.php
<?php

use Illuminate\Database\Migrations\Migration;
use Illuminate\Database\Schema\Blueprint;
use Illuminate\Support\Facades\Schema;

class CreatePageContentsTables extends Migration
{
    public function up()
    {
        Schema::create('page_contents', function (Blueprint $table) {
            createDefaultTableFields($table);
        });

        Schema::table('page_contents', function (Blueprint $table) {
            $table->after('id', function ($table) {
                $table->integer('position')->unsigned()->nullable();
            });
        });

        Schema::create('page_content_translations', function (Blueprint $table) {
            createDefaultTranslationsTableFields($table, 'page_content');
        });

        Schema::table('page_content_translations', function (Blueprint $table) {
            $table->after('page_content_id', function ($table) {
                $table->string('title', 200)->nullable();
                $table->string('meta_title', 100)->nullable();
                $table->text('meta_description', 200)->nullable();
            });
        });

        Schema::create('page_content_slugs', function (Blueprint $table) {
            createDefaultSlugsTableFields($table, 'page_content');
        });

        Schema::create('page_content_revisions', function (Blueprint $table) {
            createDefaultRevisionsTableFields($table, 'page_content');
        });
    }

    public function down()
    {
        Schema::dropIfExists('page_content_revisions');
        Schema::dropIfExists('page_content_translations');
        Schema::dropIfExists('page_content_slugs');
        Schema::dropIfExists('page_contents');
    }
}
As the
createDefault...()functions create the timestamp and soft delete columns, we use an update of the structure to add our columns in a more pleasant order but it's not a requirement, you can define your columns in theSchema::create()closure
We can now run our migration to create the tables for our Module:
php artisan migrate
/app/Models/PageContent.php
// ...
    protected $fillable = [
        'title',
        'meta_title',
        'meta_description',
        'published',
        'position',
    ];

    public $translatedAttributes = [
        'title',
        'meta_title',
        'meta_description',
        'active',
    ];
// ...
Twill uses Laravel Eloquent mass assignment, so we need to declare all our attributes in the
fillableproperty, and the translatable attributes in thetranslatedAttributesproperty (it's a common mistake to forget to add our attributes or a new one created after as Twill won't trigger an error when you edit your content, but your value will not be saved)
Form creation
In Twill 2, forms were Blade components, Twill 3 introduces a Form builder allowing you to define the form in PHP in the module controller.
Blade components give you more flexibility for very complex forms or if you want to integrate custom HTML. For standard forms, the Form builder seems to do the job. We will see both ways.
Form through Blade components
If you set the --bladeForm option on the module creation, the file already exists, if not you have to create it manually.
/resources/views/twill/pageContents/form.blade.php
@extends('twill::layouts.form')

@section('contentFields')

    <x-twill::block-editor
        :withoutSeparator="true"
    />

@stop

@section('sideFieldsets')
    @formFieldset([ 'id' => 'seo', 'title' => 'Référencement'])

        <x-twill::input
            label="Title"
            name="meta_title"
            :translated="true"
            :maxlength="100"
        />

        <x-twill::input
            label="Description"
            name="meta_description"
            :translated="true"
            :maxlength="200"
        />

    @endformFieldset
@stop
In the
contentFieldssection, we remove the title and add ablock_editorfield (thewithoutSeparatoroption just removes a separator displayed before it on the edit page)We create a
sideFieldsetssection where we add our SEO fields
Form through Form builder
The configuration is made directly in the module controller.
/app/Http/Controllers/Twill/PageContentController.php
<?php

namespace App\Http\Controllers\Twill;

use A17\Twill\Http\Controllers\Admin\ModuleController as BaseModuleController;
use A17\Twill\Models\Contracts\TwillModelContract;
use A17\Twill\Services\Forms\Fields\BlockEditor;
use A17\Twill\Services\Forms\Fields\Input;
use A17\Twill\Services\Forms\Fieldset;
use A17\Twill\Services\Forms\Form;

class PageContentController extends BaseModuleController
{
    public function getForm(TwillModelContract $model): Form
    {
        $form = parent::getForm($model);

        $form->add(
            BlockEditor::make()
                ->withoutSeparator()
        );

        return $form;
    }

    public function getSideFieldsets(TwillModelContract $model): Form
    {
        $form = parent::getSideFieldsets($model);

        $form->addFieldset(
            Fieldset::make()
                ->title('SEO')
                ->id('seo')
                ->fields([
                    Input::make()
                        ->name('meta_title')
                        ->label('Title')
                        ->translatable()
                        ->maxLength(100),

                    Input::make()
                        ->name('meta_description')
                        ->label('Description')
                        ->translatable()
                        ->maxLength(200),
                ])
        );

        return $form;
    }
}
The
getForm()method defines the fields or fieldsets in the left columnThe
getSideFieldsets()method defines the additional fields or fieldsets in the side/right column
Form in action
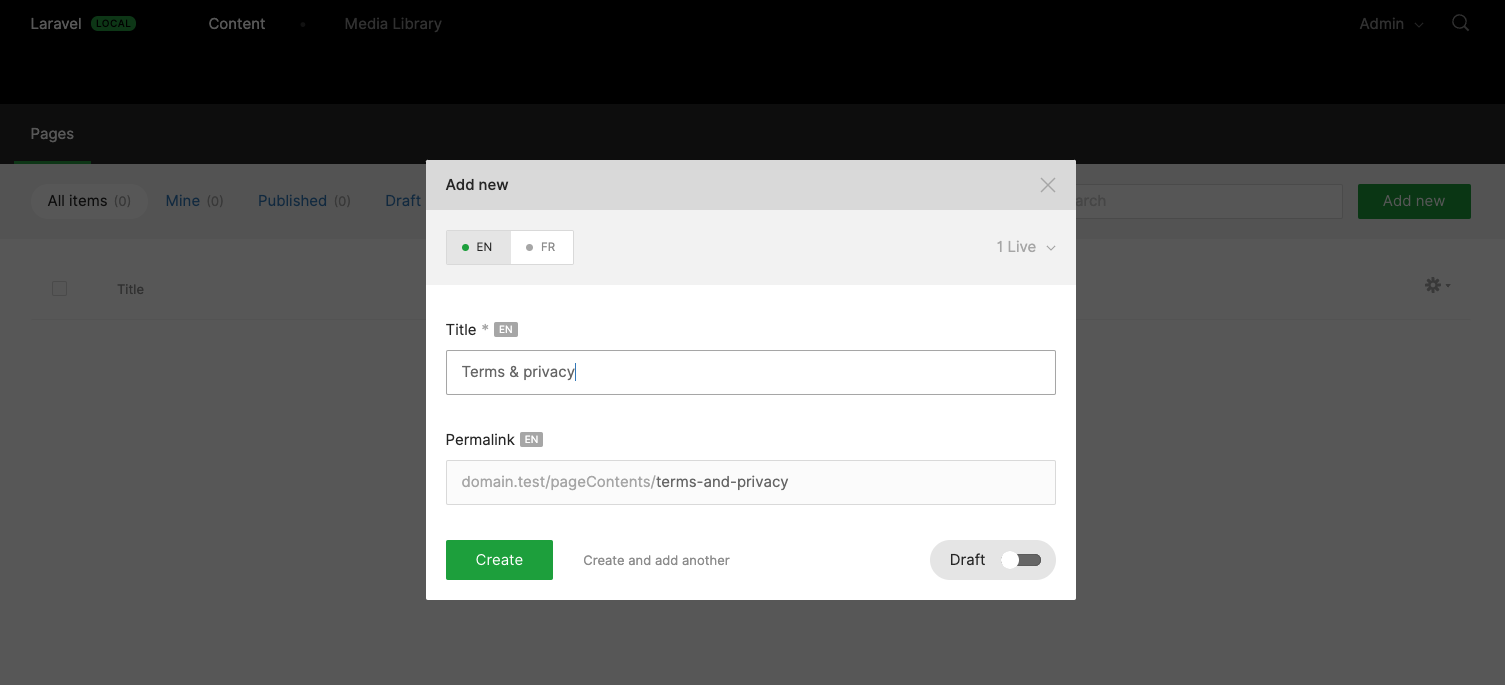
Now we can manage our content in the administration interface. Let's click on the Add new button to see a modal asking us for the title of our page (the permalink aka slug is automatically generated but you can edit it). You can fill in the information for each language and also change the publication status of your content globally and for each language):
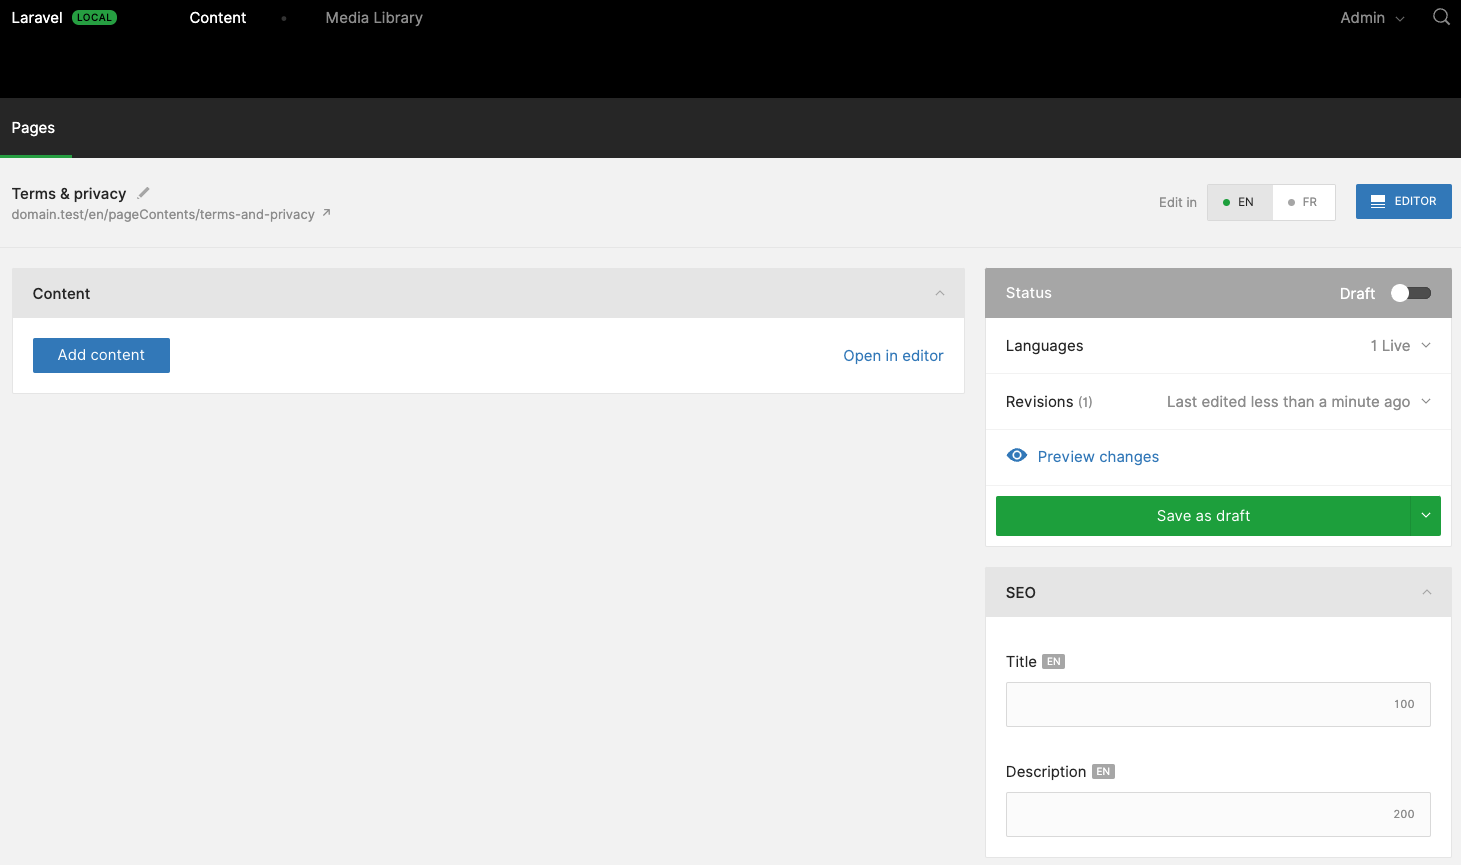
And here is the form for editing our content:
Controller customization
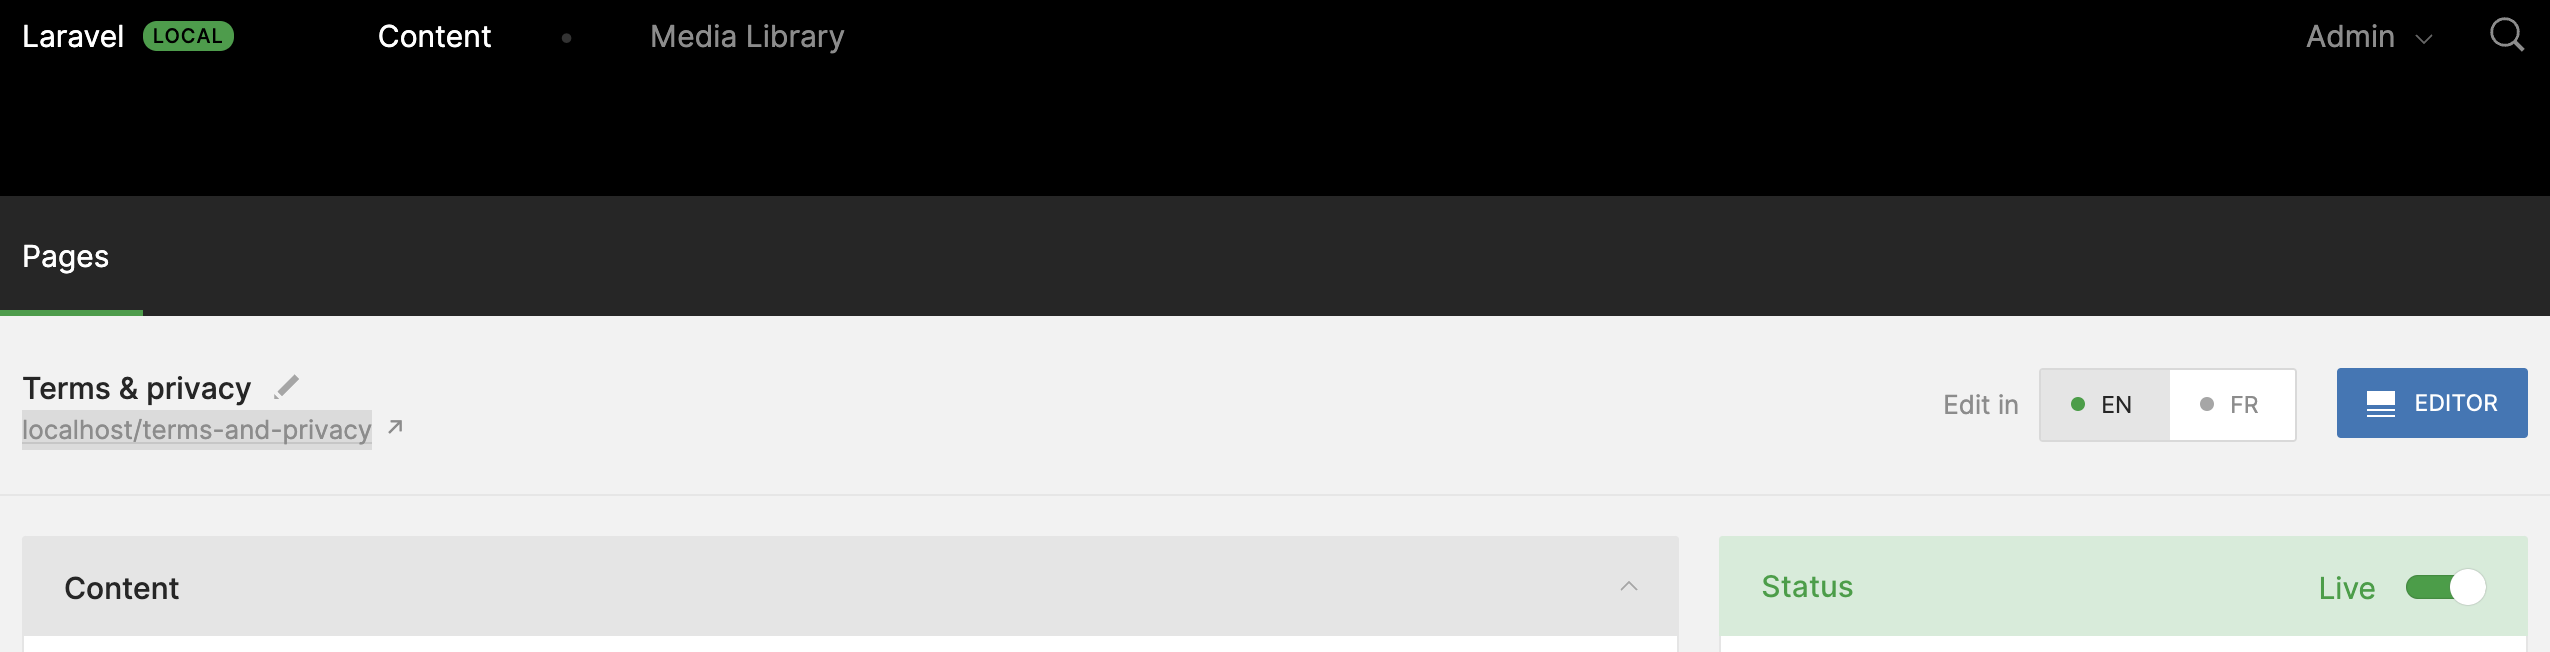
Maybe have you seen on the form screenshot an URL under the title. Twill displays a link to our front-end content based on the domain name, the module name and then the slug of our page. This behavior, and many more things (like the columns displayed in the listing, the default order, ...) can be customized in the admin Controller.
Here is some basic customization:
/app/Http/Controllers/Admin/PageContentController.php
<?php

namespace App\Http\Controllers\Twill;

use A17\Twill\Http\Controllers\Admin\ModuleController as BaseModuleController;

class PageContentController extends BaseModuleController
{
    protected $moduleName = 'pageContents';

    protected function setUpController(): void
    {
        $this->setPermalinkBase('');
        $this->enableReorder();
    }
}
We set an empty
permalinkBaseproperty to tell Twill our pages will be available directly under the Web root path.We enable reordering
More info in the official documentation
Morph map
Twill uses many pivot tables to handle polymorphic relationships with the module Models: medias, files, blocks, features, tags and Spatie activity log package.
The default behavior is to store the fully qualified class name in the database, with MorphMap you can provide an alias that improves readability and decouples the class name from the stored data.
Since Laravel 8.59, you can enforce a morph map for every class used in a morph, preventing you from forgetting to define the morph map when you create a new Twill module.
/app/Providers/AppServiceProvider.php
<?php

namespace App\Providers;

use Illuminate\Database\Eloquent\Relations\Relation;

class AppServiceProvider extends ServiceProvider
{
    /**
     * Bootstrap any application services.
     */
    public function boot(): void
    {
        Relation::enforceMorphMap([
            'pageContent' => 'App\Models\PageContent',
        ]);
    }
}
Let's talk about Front-end and Inertia
This module aims to display content pages on our front-end. To do so, we need:
a Laravel Route
a Laravel Controller
an Inertia Page
Route
Our route catches all GET HTTP requests with a slug from the Web root path:
/routes/web.php
<?php

use App\Http\Controllers\App\PageContentController;
use Illuminate\Support\Facades\Route;

Route::get('/{slug}', [PageContentController::class, 'show'])->name('page.content.show');
Controller
To handle the logic, we need a Controller. As Twill already stores its controllers in a Twill directory of /app/Http/Controllers, we will store our application controllers in a App directory (it is not mandatory, but it may help in your project organization, and of course, you can choose the name you want, like Site, Front, ...).
The first step is to move the default /app/Http/Controllers/Controller.php in app/Http/Controllers/App/ and change its namespace (again, it is not mandatory):
/app/Http/Controllers/App/Controller.php
<?php

namespace App\Http\Controllers\App;

use Illuminate\Foundation\Auth\Access\AuthorizesRequests;
use Illuminate\Foundation\Validation\ValidatesRequests;
use Illuminate\Routing\Controller as BaseController;

class Controller extends BaseController
{
    use AuthorizesRequests, ValidatesRequests;
}
Now we can create our App Module controller:
/app/Http/Controllers/App/PageContentController.php
<?php

namespace App\Http\Controllers\App;

use App\Models\PageContent;
use Illuminate\Http\Response;
use Inertia\Inertia;
use Inertia\Response as InertiaResponse;

class PageContentController extends Controller
{
    public function show(string $slug): InertiaResponse
    {
        $item = PageContent::publishedInListings()
            ->forSlug($slug)
            ->first();

        abort_if($item === null, Response::HTTP_NOT_FOUND);

        return Inertia::render('Page/Content', [
            'item' => $item,
        ]);
    }
}
What it does
Load the Twill Model (item), from its query builder:
publishedInListings(): scope that adds
published == trueand if you use publish dates (publish_start_date and publish_end_date), checks that the Model is currently visible (publish_start_date <= now()andpublish_end_date >= now())forSlug(string $slug): scope that looks for Models that have an active slug that matches the string given for the current locale
first(): return the first Model that matches the query criterias and return
nullif none are found
Return a 404 if the Model is
nullRenders the Inertia
Page/ContentPage withitemas a prop
Page
The last step, we create our Inertia Page as a Vue Single-File Component (SFC).
/resources/views/Pages/Page/Content.vue
<script setup lang="ts">
interface Props {
  item: object
}

defineProps<Props>()
</script>

<template>
  <div class="bg-gray-200 w-full h-screen flex flex-col justify-center items-center">
    <h1 class="text-center text-4xl font-semibold text-gray-900">
      {{ item.title }}
    </h1>
  </div>
</template>
What it does
Declare the
itemprop as a generic object (we will see later how to improve the props declarations)Display the
item.titlein a centered full-screen page
Final result
If you publish your page (status Live), you can click on the permalink to open the front-end page in a new tab:
and you should see:

We now have a first module to handle content pages, we will see in later articles how to improve logic, performance and handle more complex content structure with blocks
We'll do our best to provide source code of the serie on GitHub